Introduction
Night photography quickly addresses a problem that is often encountered in photography. Normally we face situations where it seems like ordinary scenes do not really matter, but it’s not interesting. Pictures of buildings or streets are often dull. Typically people see shots taken at night. The same scene – shot nightly – could however make for an intriguing picture. Photography in the evening may seem magical for someone who just starts to take pictures.
Tower bridges. Exposure 2.6 second shutter speed, aperture 5.6, ISO100.
Ditch night mode and choose manual settings
Can I use the images in an evening? Some DSLRs are fitted with night mode that sets the shutter speed and ISO at the maximum speed automatically. Instead, use nighttime settings on the camera rather than manual shooting. It is best first learn about the settings for exposure in your system. We hope you will find some helpful tips for exposure. It depends on 3 factors. It is shutter speeds, apertures and ISO which we use differently when we’re at night. How are we able to take photos at night? You need to start off by switching your camera to manual mode. Manually, it’s possible for the user to control these settings as he/she wants.
Get the right equipment
Are there cameras that will help you capture night photos? The simplest equipment should consist of sturdy tripods. A tripod allows an extended exposure of the image. Shooting at a slower shutterspeed allows for fun and interesting effects. If your camera has a hand-held focus, it is much less flexible. You must keep the camera in place longer than necessary. The best way to use a tripod is to ensure optimum stability. The photo below was shot at ISO3200 at the aperture of 5. I have no IS lens, but I am not using that. Instead I positioned my subject’s lips as the main reflection points for creativity effect.
Explore the Unknown
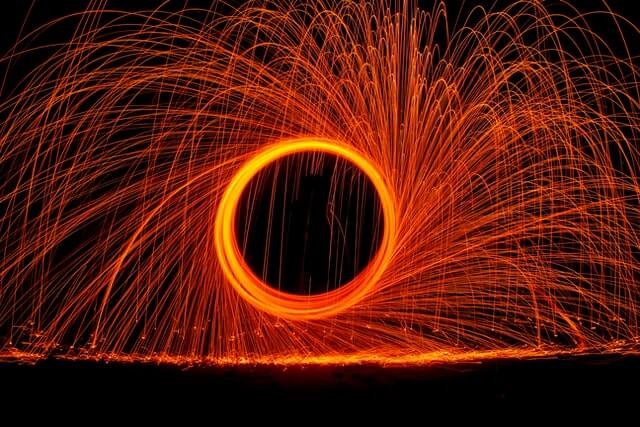
Photo nights are excellent equalizers. When the darkness is too great outside the work is like creating an empty canvas. How can we choose a good night shooting location and where we should shoot? You can keep learning or come home night time to get your camera or you will move somewhere else. Photographs taken at night may reveal things people don’t normally see. In addition, long exposure will allow the star to be noticed. Areas you know look differently during the night. But because you know the place you can’t photograph it all together. Explore a new place, start fresh.
Use manual focus
Modern cameras have automatic focus, but they aren’t always perfect and reliable. These weaknesses are particularly apparent when taking photos at night when the camera cannot adjust because the darkness is behind you. Use manual focus to ensure that the camera does not focus arbitrary parts of the image. Set the focus of a camera’s lens at the infinity level. For crisp images, turn on Live View Mode then click the zoom button on the magnifier icon. Make the subject more visible and then adjust until the object is pin-perfect. Do not activate autofocus while taking pictures.
Prepare Your Composition and Settings to Get the Best Shot
Shooting during the evening can be a challenging skill as the shots require longer exposure. I compare this to film production. If you’re thinking about photography at night, you should be thinking about capturing the best photos.
Night photography is available from midnight till dawn. Throughout these years, the color palette can vary. Night photography has a similar principle as black and white photography.
For example, some of the factors affecting the colors on your photographs will change the contrast. Take long exposure to night skies unless it seems like light.
Just remember, camera shake is your worst enemy in night photography!

Experiment with Bulb Mode
Photographer: Federico Bencari. In a typical camera, the most typical shutter speed was 30 seconds. Sometimes, however, the time for an effective exposure takes longer than 30 seconds. So Bulb modes are introduced. The shutter opens by pressing the shutter button. Bulb can be easily seen after 30” in manual mode on many camera models. Using Bulb mode overrides all automatic settings in camera and therefore requires comfortable manual mode. Above photographer Kris smashed around 1600 pictures with a GoPro, which gave him the stunning shot of his own.
Exposures for Night Photography
Pigeon Point light house in California. Exposed: shutter speed 6 sec. Aperture f5.6. 1600 ISO. The biggest difference between daylight and evening photos is the exposure value. Dark changes things. However, if you have a camera mounted at a certain angle, the exposure is actually not very hard. Tell me the most important thing you might have heard? You’ll be exposed by three control points: aperture, shutter speed, and ISO. Due to the darkness, your camera requires a lot of lighting, and you cannot do this with a button in the third control.
ISO
The third exposure control ISO measures the sensitivity to light in digital cameras. Higher ISO settings increase the ability in the camera to respond more effectively to light and therefore allow the use of less flash or less aperture. However, we are not having lunch. High ISOs can create digital noise on your photographs. The darker parts of the photo often display more digital sound when compared with lighter parts so it’s often an issue for night pictures. Therefore, do not be afraid of cranking up ISO at night as long as it is possible. Because we are using a tripod, it is normal not to be necessary if we are using high ISO.
Shutter speed
In a daylight period, shutter speeds usually last about one second. Nevertheless during the night, the camera’s shutter speed is sometimes considerably slower. It can be a dark environment so the camera needs a longer exposure period to get enough light to properly film the scene. This is a long-term shutter and the camera must be steady otherwise the pictures will shift while you are shooting. So tripods are necessary equipment for nights. You can keep the shutter open as long as you like as long as your camera is steady without any movement.
Aperture
The aperture opens a lens to allow sunlight into the camera. The diameter of the aperture determines the light entering the camera for an aperture speed that affects depth and also affects aperture. There are generally no differences between utilizing the shutter at night or using the screen at night. A camera can’t get enough sunlight for a good image and therefore, the tiny aperture will often need ridiculously long shutter speeds. Its black color allows for a more streamlined image to achieve a larger depth of field.
A sturdy tripod is a must
Before you start shooting nights, you need a sturdy tripod. Photographers need a long exposure to photograph a photograph that is dark. Get a camera capable of handling heavy cameras, preferably from aluminium or carbon fibre, for more money, because it is both lightweight as it is durable. Photo by Diego Hernandez. You can measure your tripod’s bubbles by measuring their level. Alternatively, the camera can activate virtual horizons (which are typically found on its menu) and check for equipment leveling. Make an investment in mini tripods!
Shoot RAW
JPEG files are ideal for most casual photographers because they do not require terribly much memory. It’s also possible to upload images with JPG files without converting them into other formats. However it also compresses images severely, which makes it difficult for you to shoot scenes in very large dynamic range. The night photography menu can switch the file formats to RAW for a specific camera. Raw files consume much space on your computer’s card, and your pictures need editing before that but the images retain their quality.
Making photos at night is incredibly interesting. Often professionals who specialize in photography embrace this topic with a deep passion and continue the quest to improve their technique and creativity, but are not aware that the simplest photographic principles are often adapted or even overlooked during the night. If you decide to travel into the darkness, consider following these tips to help you adapt to the darkness.
Use low ISO if possible
Using high ISOs is probably more appropriate when shooting during daylight, but it can cause some noise. This latest high-end camera is so advanced it can capture noiseless images at ridiculously high ISO levels. For most cameras that have limited light sensitivity this means reducing ISO is the best method. Tell me the ISO limit for the lens? For that, you should take some test shots in lowlight using varying ISOs. Look at the photo for some degree of noise. Those with an ISO 1600 display should be set at a lower setting.
Focusing
Another last problem when shooting night photography is that it can often be very difficult. It’s because cameras usually focus on seeing contrasts. If it was too dark then the camera couldn’t detect it. There is however a way for the camera to focus properly. Firstly, focus mainly on the bright light of the image. It would be useful to have street lights. Try focusing attention on the light (between bright and dark areas) to get that contrast needed. Keep in mind that the focus is the same distance from your final image.
It sometimes becomes difficult to capture perfect images at night. Minimise guessing your settings using brackets for your photos. Using this technique, a camera can take multiple pictures at a single setting. When a photo is taken it becomes brighter or darker. Ideally, a photo of these pictures will provide your desired exposures. Photo: Chad Verzosa. You have the option of bracketing a picture automatically. For automatic adjustments of the frame, select Aperture Priority and Speed Priority.
Play with different shutter speeds
Photo by Sanjeevan Satheeskumar – Photo / Featured Images. The camera automatically chooses the shutter speed by selecting the aperture. The mode gives the ability to create dazzling light streaks at night. Again the test shots will be needed to achieve your desired effect. You can set camera speed at 1/30 seconds to 1 minute and 30 seconds to make bright and colourful pictures. Remember that the faster the shutter the more light traces are created. Use of wide aperture settings on prolonged exposures is not required.
What to bring for night photography?
Breckenridge Colorado – Exposures: Shutter speed 15 second. Firstly we’ll talk what equipment to use when photographing. There’ll be no additional equipment required. Besides the usual cameras and lenses, there is no tripod. This means that your lens must have a long shutter speed for the correct exposure. It’s therefore important that the camera can keep the tripod in place, so securing this is the right choice. The release of remote shutters helps keep the camera steady.
Exposing the Night Photos
I have one specific exposure set to tell you now since they’re usually similar. This is the exposure setting to capture the night skies. This isn’t set in stone but you’ll find that my photos of the night sky give them some exposure. What about lenses with no aperture? The ISO will then be increased or the shutter speed will go up accordingly. Usually, your lens’s maximum aperture is F/3 – this happens for most kit lenses as well – you must find another 2/3 stoplight in your camera settings.
Capture the Night Sky
Take a night-time photo at an extended distance for incredible results. Sky photography during the night offers many effects. There’s also the possibility to include motions in clouds. It’s really simple for anyone interested in photographing stars. If you are shooting star images, it’s necessary to keep the shutter speed low by 20 sec. So it prevents star trail. For night photography, adjust apertures to the most extreme degree and keep ISO at the highest level.
Shoot in aperture priority mode for static subjects
If the manual mode has no idea how to work please click on Aperture Priorities. When a camera has f/2.8 aperture, it automatically chooses the shutter speed. Aperture Priority takes pictures during darkness.
Camera settings
After setting your camera up in this mode with an aperture large, position your camera. This mode can take photos at night when the subjects are not moving. It is ideal for a static scene, such as buildings and landscapes.
A starting point for proper exposure
This is something I’m trying to do in the hope I’ll get you started. Is the aperture priority mode used by most folks? You can still use automatic mode by using aperture priorities. It’s still semi-automatic and therefore it sets the shutter speed to give you the correct exposure, though you can set aperture and ISO. We’ll start with the apertures. Start with an aperture f/5.8 that is relatively low and gives good light.
What is the best camera for night photography?
The most important features when selecting an image camera are a high ISO range, wide dynamic range and large sensor. Most digital cameras have those functions and if you use good DSLRs, your coverage is good! When selecting cameras for night photography look for those with a large ISO range. You should likely set ISOs above 3200 and therefore even an excellent camera will probably not perform this task.
Cool Night Photography Ideas
It’s possible for a photographer to capture a few interesting subjects at night and take them anywhere they want to be shot. Cities with plenty of amazing photographs. You can shoot a number of things. Photographs: Develop a good portrait photographer and shoot at night to capture beautiful, moody photographs. They’re perfect when it comes time to make your portrait photographs a bit more interesting.
Take test shots
Night photography requires a methodical approach than day photography. It’s not possible to click a shutter on a light. You must know what setting to use on your camera and then take a few pictures. Take test photos that give you an opportunity for experimentation. How should we photograph light stripes? Then use various perspectives to create more interesting images. You can change camera settings.
Picking a subject for night photography
When it’s time to take some photographs you need to find a good photographer. It’s a lot different from working at work in the day. Good subjects are good subjects. Despite that it’ll be ok to see it differently in the evening though. Let’s talk a little bit about what I love to photograph at night. I hope these are good suggestions to get you started in your own way.
Museums and public buildings
Louvre, Paris. I had to hold on to the photograph as the photograph took place inside the Louvre so I had to turn the ISO up and open the aperture. Shutter speed 1/10 sec. Buildings with bright lighting are the perfect choice when it comes to nightly entertainment. There’s nothing wrong with this. Even though it’s obvious this concept can still be very useful if executed effectively. It can even be used in conjunction with your evening photography. You’ll have a new plan when you wait for the pictures to come out.
Car Light Trails
Dallas – Exposition: 20 s, aperturef/16. ISO – 100. In the evening, you can include the lights drenched by moving vehicles in the photo.
This happens if the car runs through the frame with the shutters opened. Since the car is in the frame with the shutter open, they are visible in a picture with light stripes.
Try adjusting the timing for the picture so the vehicle moves around while the shutter is closed. Find out the steps of creating dynamic pictures of lights in cars for more details on this technique.
Overlook and Vistas
Ending with the views of this place. Some of my best night photography is nighttime view of city.
It’s easy to see skyscape pictures. Keep in mind that a very beautiful image often doesn’t necessarily produce a perfect image. Make certain that your background has an interesting focal point.
City in Manhattan Bridge – Exposure – 10 second shutter speed. The subject should be carefully chosen when selecting the subject for the night photograph. Always try to do tests.
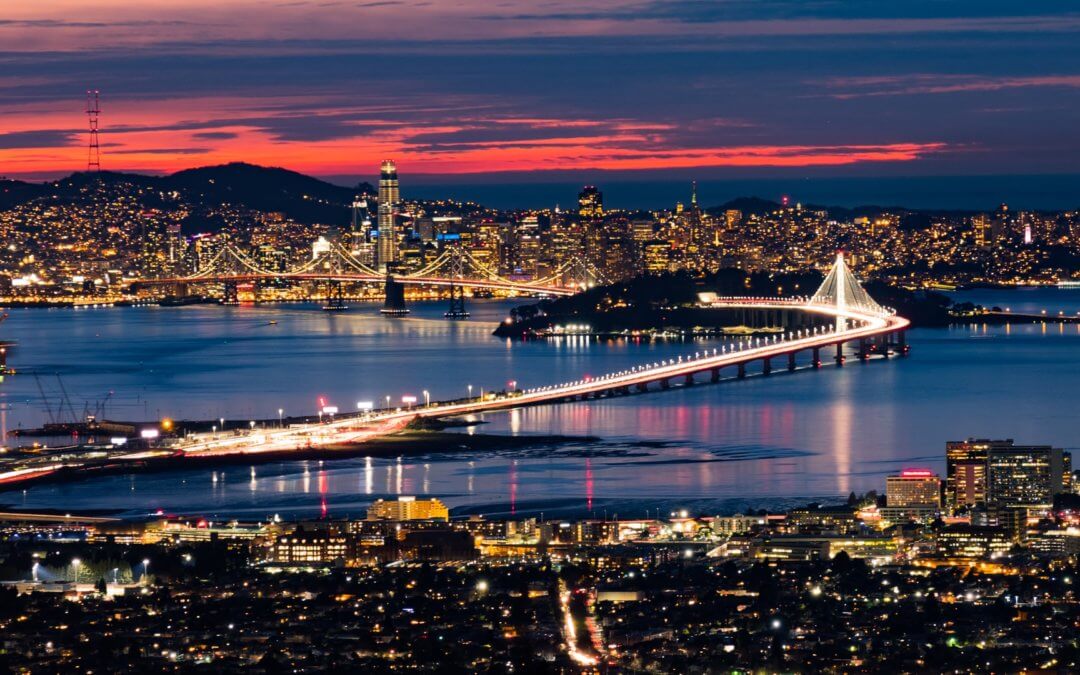
Bridges
Brooklyn Bridge, NYC – Exposure: Shutter speeds of 15 seconds, apertures of f/11 and ISO200. Almost all of our cities have bridges.
It might not be The Golden Gate Bridge, but there’s going to be a bridge and the lights at night are pretty good, making this a fascinating topic.
The longer exposure times used to photograph the night will make the water under the bridge bluish and the vehicle will flash like streaked light.
Streetlights
Keep a watch on street lights while shooting at night. It is possible to use these resources in many contexts. This adds something interesting and may otherwise leave blank spaces on the picture. The more lights the more lines the better. Washington. I wanted the twinkle effect in a street light and used a smaller aperture. Exposure: Shutter speed 8 second, aperture F16, ISO 800.
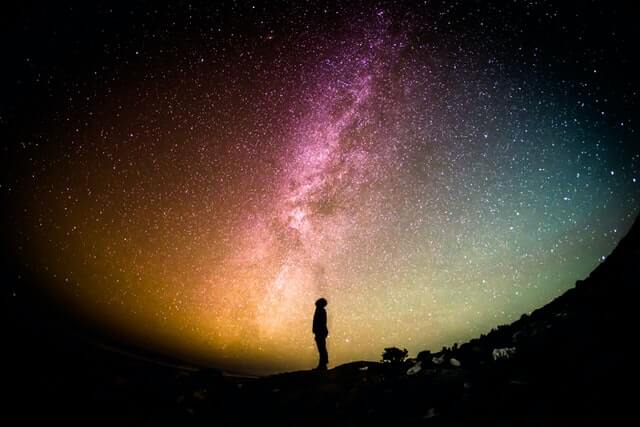
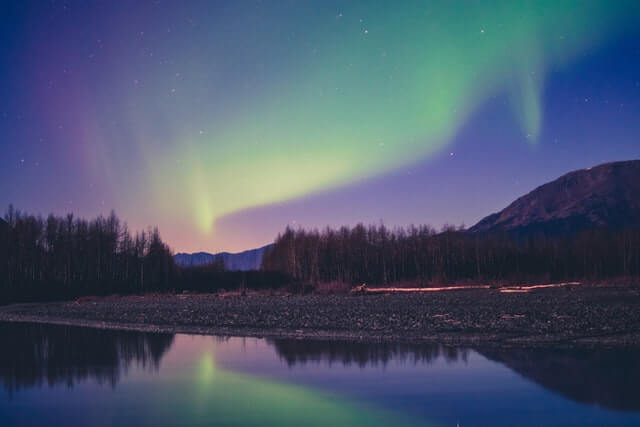
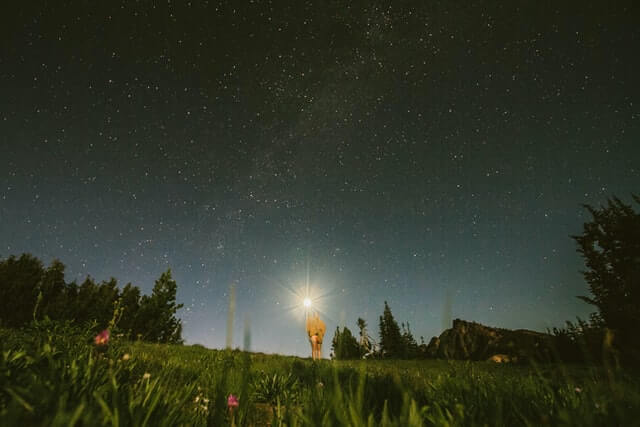
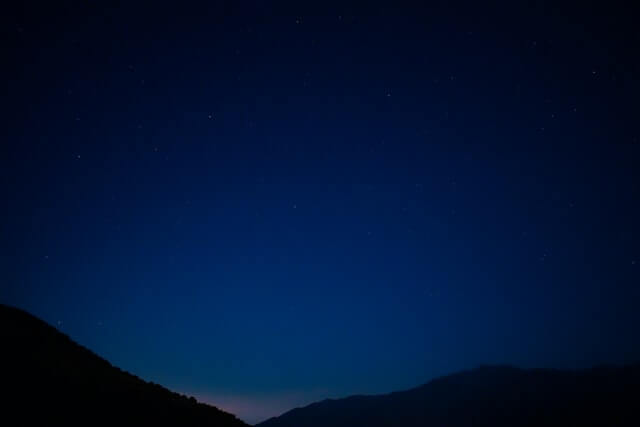
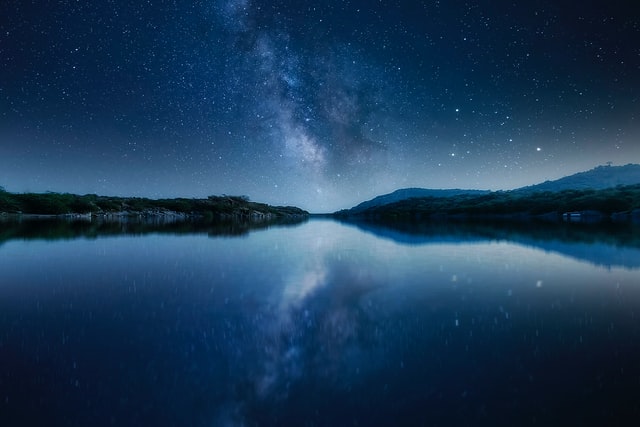
Night sky
You only have to spend a clear night in your home country to get a good picture. Moonless and calm nights are best. Getting a chance to see Milkyways is a great way to experience this phenomenon. Look for a free app called Starwalk 2.
It’s a tool to learn about the timing of all this stuff. Adding an attractive background is even better.
Fountains
Buckingham Fountain, Chicago – Exposure: shutter speed 1 second. Probably my most preferred nighttime subject is the fountain.
Of course, the lights also have a variety of colors, adding more interest. The fast shutter speed at night makes the fountain feel like it’s flowing.
Reflections
Reflection in London UK – Exposures: shutter rate 1.3 second, aperture f/8. – ISO200. The longer shutter speeds you have will improve reflection at night. Apparently the same goes for lakes. It applies to puddles. When rain falls, night photos are very good options.
What is the best lens for night photography?
Choosing the best lenses for night photographs is simple. Good news for photographers is that some good portrait lenses are also great at night.
It is important to get lenses that allow light in large quantities.
Therefore, the most suitable lenses must have an aperture of around f/1.2. Prime lenses have bigger apertures which are most definitely what you should use.
Here are some handy night photography tips
How to improve my photography skills with shooting night photos? Jpegs is an excellent option because you can put more photos into SD cards. However, you can probably shoot in Raw on a night camera.
Are you aware of this broad dynamic range? If a JPG image compresses the pictures then your final image does not show the full width of the pixels.
Experiment with reflections
Reflection is a very difficult thing during the day due to its dependence on light. Natural lighting is eliminated, and it is just as easy if we remove the human-made light.
Please use the maximum color possible. They are merging into a reflection of the waters. There will also be contrasting smoothness and sharpness.
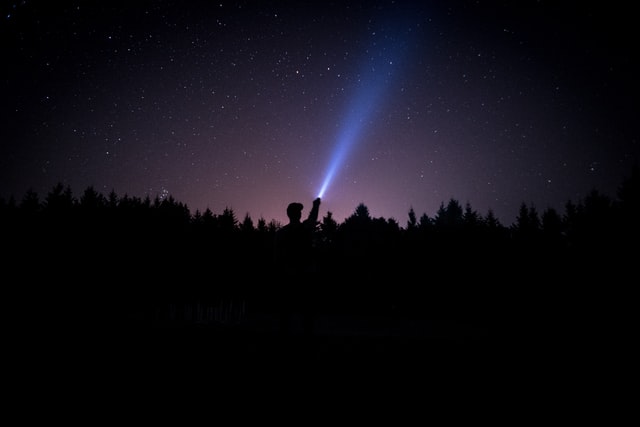
Create fun light trails
Light trails can be fun for night photographers.
In the photo below, I went to the town at night and accompanied some friends there. We were driving through this scene and capturing the other people’s light trail with our camera.
In this photograph, the exposure was f/5.6 at ISO 200, at shutter speeds 235 and f/8.
Shoot on film for cool, creative effects
There are really cool ideas that we simply cannot accomplish at night. Filmmaking can be fun. You may not know what settings to use but bring a camera with you.
You must test the settings in your camera before shooting the video with your analog camera. So learning can happen quicker, without spending too much.
Try Bulb mode
In Bulb mode you can hold the camera open while holding on to the shutter lever. Shooting at faster shutter speeds than you can normally.
It’s good for creative night photography when you need more time to capture light trails, star trails, or paint.
Capture movement in your night scene
Movement is an obvious option when photographing long exposures at slower shutter speeds. It’s easy to achieve contrast between still and moving objects with a tripod camera.
The photo is shown above taken in the US at an exposure time of 10 seconds.
The ideal camera settings for night photography
Even in capturing a beautiful evening scene with a good night photography device, it is still important to use an adequate set of lighting settings.
List the five settings to choose from when taking photos in the evenings.
Conclusion
Night photography is an enjoyable hobby for anyone who understands the fundamentals. As long as we understand exposure settings you’ll get interesting photographs.
Change subjects and lighting sources and try out new photography composition techniques.
When taking pictures with long exposures you should keep the camera fixed. How are stars captured?
What settings should I use for night photography?
Although precise settings will vary in pictures, the optimal conditions for capturing photos at night are high ISOs (generally at 1800), open apertures such as f2.8 or f/4 and maximum shutter speed calculated according to the 500 or 300 rule.
Is night photography hard?
What makes night photography difficult?
When frozen something moves the shutter speed should reach the hundredth second. It’s especially tough to shoot during the evenings.
How do you take night shots?
Shooting in aperture Priorité mode on static subjects, Aperture Priority makes for quick and easy photographs in daylight. When the camera is set for this mode and selects a large aperture then it’s time to shoot. If you can’t move a subject, the mode is the safest way to photograph at night.
How do you take night photos?
Photographs of nights. Specifications of the cameras in the camera. – Manually controlled mode. Shutters are in the range of 30-60 seconds. As darkness occurs, longer shutter speeds allow more light into the camera. … Aperture f 8, f11 and f 16. = = = = = = = = = ISO 100 or 200. … Make the white balance automatic. … Adaptation manuals. … Filming raw.
How do you shoot at night with low light?
8 Lowlight tips to enjoy an amazing evening photograph. You can upgrade your ISO. The ISO speed varies according to the light intensity of your photo. ‘ Keep the view open. … Is it really necessary to have the bike? = = = = ) Keep the shutter closed longer! … How Do You Make Your Lights Sparkle? … Lamp paintings are available. … I need a focus. …. Postproduction.
How do you get crystal clear night pictures?
Can we photograph our Milky Way? Learn how camera equipment works properly. Take light pollution into account and look into dark spaces. Apply correct night vision skills. Use a suitable camera setting. Invest in the elements of the background to create a memorable composition. Take it in the Milky Way. Postprocess milky way.